 Save
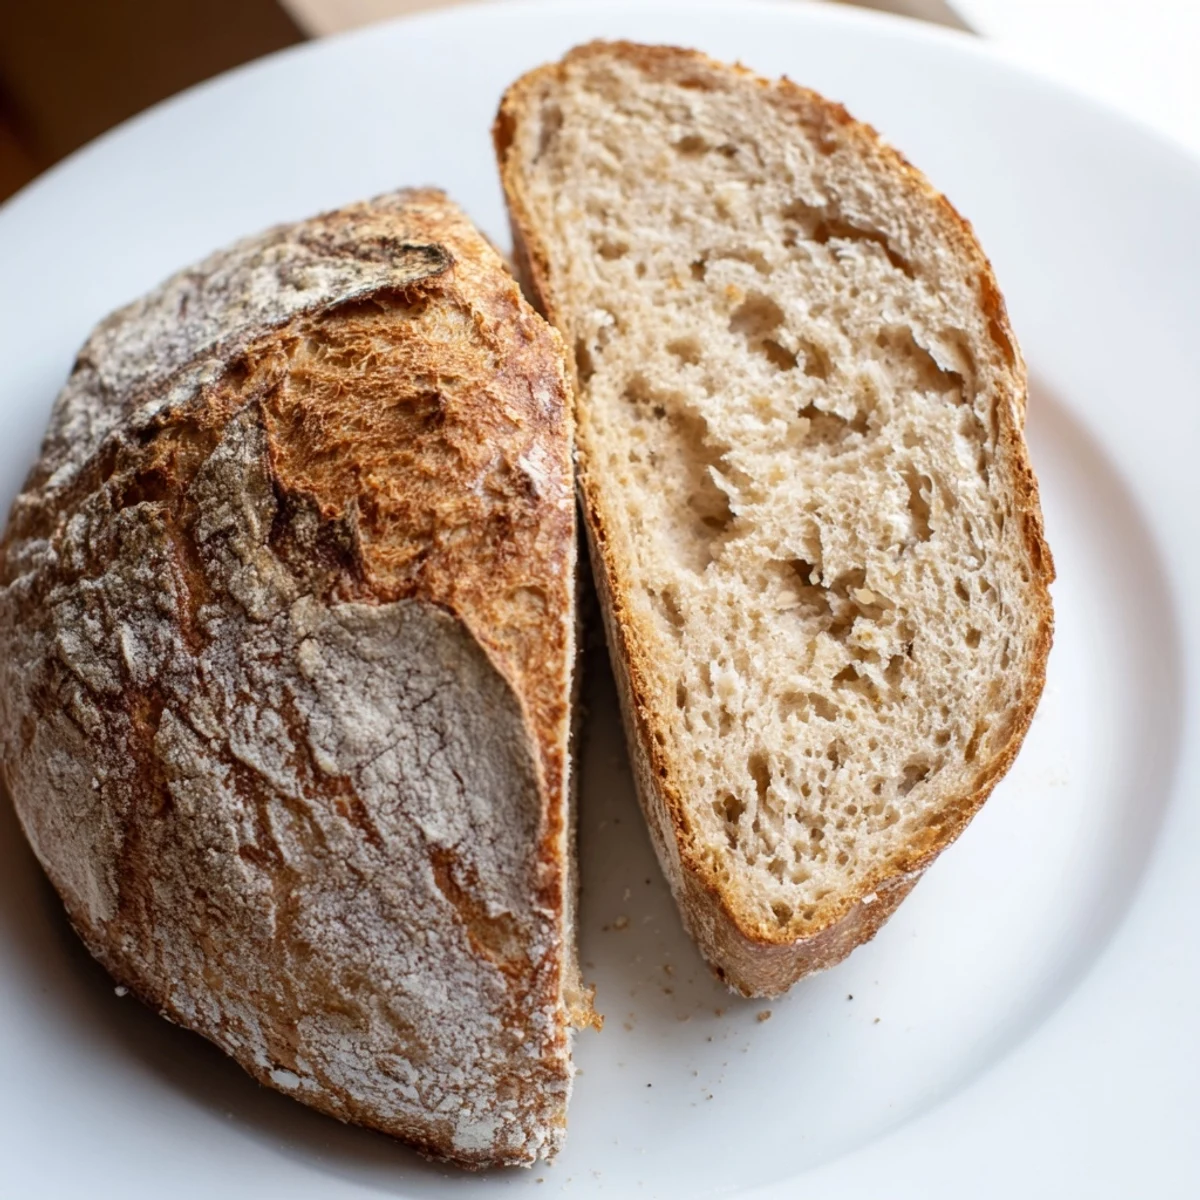
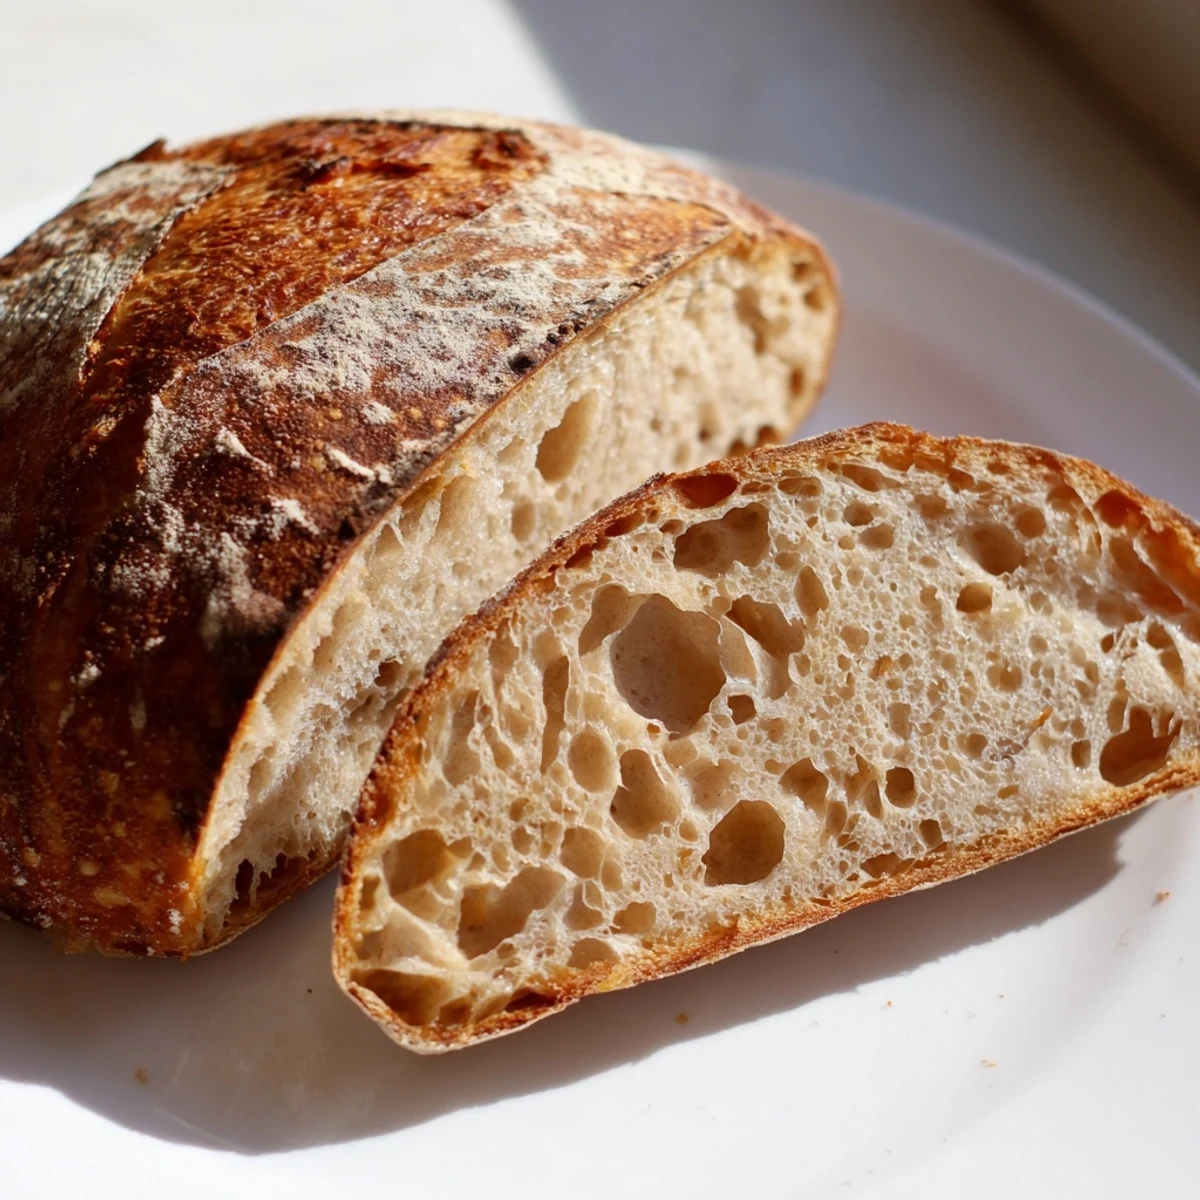
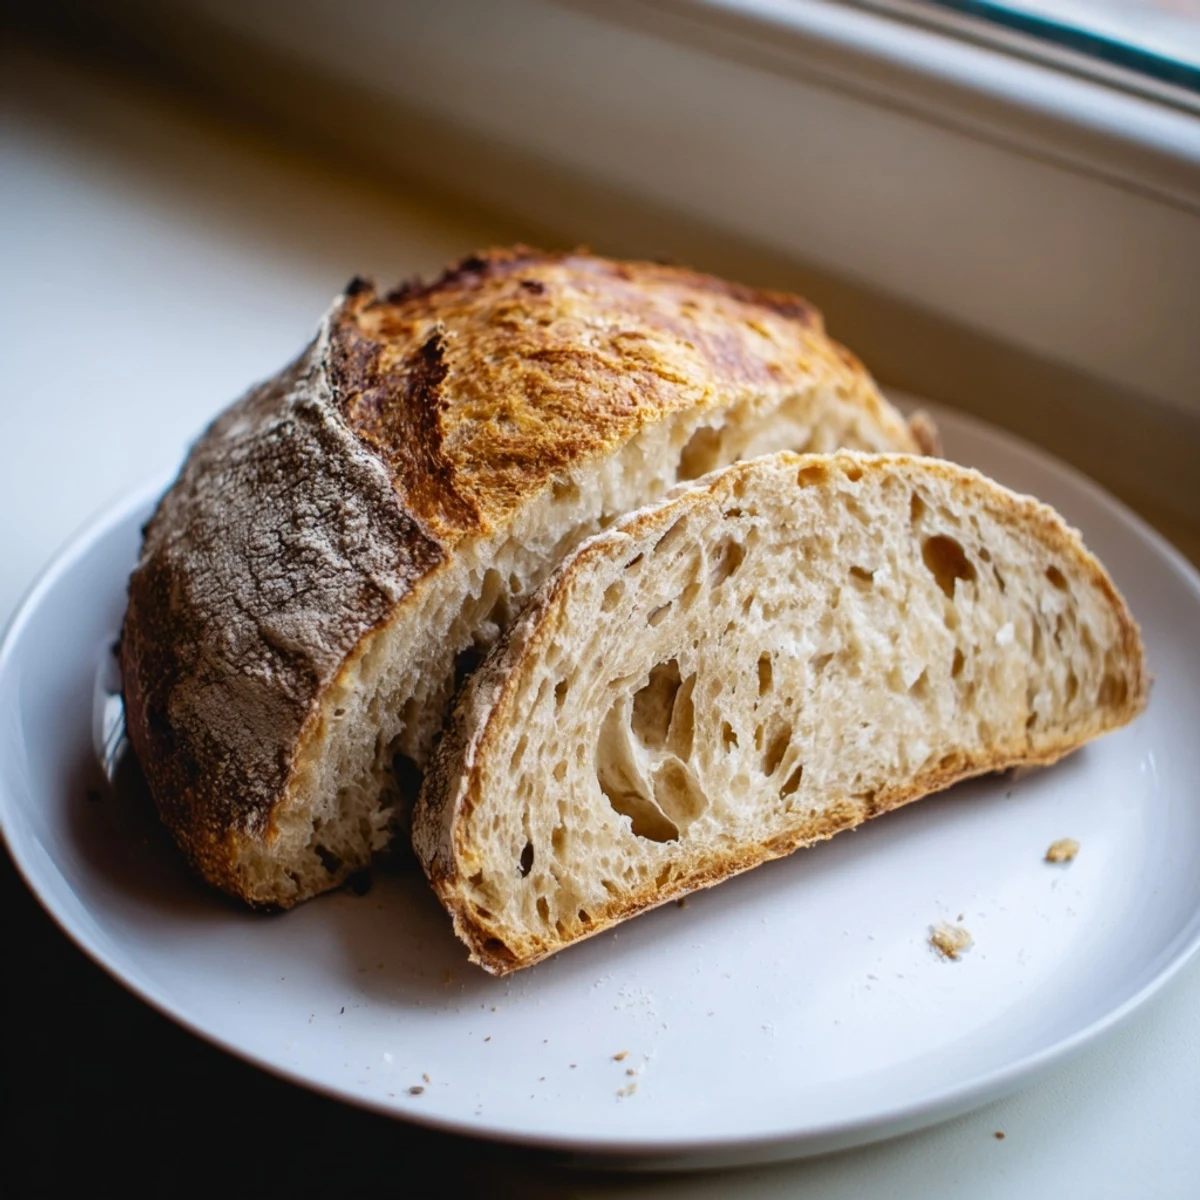
Save This traditional sourdough delivers everything you love about artisan bread: a thick crackling crust, open and chewy crumb structure, and that signature tangy depth that only wild yeast fermentation can create. The process spans 14-20 hours from start to finish, but most of that time is hands-off fermentation allowing natural enzymes to develop complex flavors and digestibility.
You'll perform simple stretch-and-fold techniques during bulk fermentation, followed by shaping and an optional overnight cold proof for enhanced sour notes. Baking in a preheated Dutch oven creates the professional-level steam environment needed for exceptional oven spring and that coveted crispy crust. The result is a stunning large loaf that yields 10-12 generous slices perfect for morning toast, sandwich bases, or accompanying cultured butter and olive oil.
The winter my oven became my only reliable companion, I stumbled into sourdough completely by accident. A friend passed me some starter in a jelly jar with instructions that felt more like cryptic poetry than a recipe. Now there's something almost meditative about the rhythm of feeding that starter, watching it bubble and breathe against the kitchen window. Those long fermentation hours taught me that good things really do come to those who wait.
I made my first really successful loaf the morning of my sister's birthday breakfast. The way she went quiet after that first bite, eyes wide, said more than any compliment could. That bread disappeared faster than I could slice it, and honestly, nothing beats knowing your hands created something that brings people that much joy.
Ingredients
- 100 g active sourdough starter: This living culture is the heart of your bread, so make sure it's fed and bubbling with activity before you begin
- 375 g bread flour: High protein content gives you that chewy, open crumb structure that makes sourdough so satisfying to eat
- 25 g whole wheat flour: Adds depth and subtle earthiness that balances the tangy fermentation flavor beautifully
- 275 g room temperature water: The temperature matters more than you think, too cold and the dough struggles to develop properly
- 10 g sea salt: Don't be tempted to reduce this, it's crucial for flavor and helps strengthen the gluten structure
Instructions
- The Patient Mix:
- Combine your flours and water in a large bowl, mixing until just shaggy and no dry flour remains. Cover the bowl and walk away for a full hour, letting the flour hydrate completely before adding anything else.
- Bringing It Together:
- Add your bubbly starter and sea salt to the rested dough, working them in by hand until fully incorporated. The dough should feel smooth and slightly stretchy against your fingers.
- The Stretch and Fold Dance:
- Let your dough ferment at room temperature for 4 to 5 hours, performing a stretch and fold every 30 to 45 minutes. Grab one edge of the dough, pull it up and over the center, then rotate and repeat until you've done all four sides.
- Shaping the Dream:
- Turn your dough onto a lightly floured surface and gently coax it into a round shape. Let it rest for 20 minutes to relax the gluten before your final shaping.
- The Final Shape:
- Form the dough into a tight round, creating surface tension, then place it seam side up in a well floured proofing basket or bowl.
- The Waiting Game:
- Cover and let rise at room temperature for 2 to 3 hours, or tuck it in the fridge overnight for that extra tangy flavor that comes from slow cold fermentation.
- Getting Ready to Bake:
- Place your Dutch oven in the oven and crank the heat to 480°F, letting it get screaming hot for at least 30 minutes. That intense heat is what creates the beautiful oven spring.
- The Grand Finale:
- Gently flip your dough onto parchment paper, score the top with your sharpest blade, then transfer it into the hot pot. Bake covered for 20 minutes, then remove the lid and continue baking at 430°F for another 25 minutes until deep golden brown.
- The Hardest Part:
- Let your bread cool completely on a wire rack before slicing. Cutting into warm bread will ruin the crumb structure you've worked so hard to create.
 Save
Save There's nothing quite like the first slice of fresh sourdough, still slightly warm from the oven, slathered with good butter. Those moments make every hour of waiting feel like a gift instead of a chore.
Understanding Your Dough
I spent months watching my dough like a hawk before I learned to trust the process. Some days it moves faster, some days slower, and that's completely normal. The more you bake, the better you'll get at reading those subtle signs that tell you when your dough is ready for the next step.
Scoring Confidence
My first scores were tentative little scratches that did nothing for the final loaf. Don't be afraid to make a confident, swift cut at a slight angle. The dough will open up beautifully where you've made room for it to expand.
Making It Your Own
Once you've mastered the basic recipe, try adding toasted seeds, herbs, or even a handful of chopped olives. I've found that even small additions can make each loaf feel like a new adventure.
- Keep your starter consistent with the same flour and feeding schedule for reliable results
- A spray bottle of water creates steam in your oven for an even crisper crust
- Leftday sourdough makes incredible French toast or croutons that elevate any soup
 Save
Save May your kitchen always smell like rising dough and your table always hold warm bread. There's something deeply satisfying about feeding people with food you've nurtured from start to finish.
Recipe FAQs
- → What makes sourdough different from regular bread?
-
Sourdough relies on wild yeast and beneficial bacteria naturally present in flour rather than commercial yeast. This longer fermentation process breaks down gluten and phytic acid, making nutrients more bioavailable while developing complex tangy flavors and improving digestibility for many people.
- → Can I skip the overnight proof?
-
Absolutely. Room temperature proofing for 2-3 hours works perfectly fine. The overnight cold proof simply develops a more pronounced sour flavor and can be more convenient for scheduling bake times. Both methods produce excellent results.
- → Why do I need a Dutch oven?
-
A preheated Dutch oven creates a contained steam environment essential for professional-quality sourdough. The trapped moisture allows the dough to expand rapidly before the crust sets, resulting in superior oven spring, an open crumb structure, and that signature crackly crust.
- → How do I know when my starter is ready?
-
Your starter should be fed 8-12 hours before mixing and should be bubbly, doubled in volume, and pass the float test—a small dollop should float in water. It should have a pleasant yeasty aroma, not harsh or overly acidic.
- → Can I use all-purpose flour instead of bread flour?
-
Bread flour's higher protein content (12-14%) provides better structure and chew. All-purpose flour (10-12% protein) will work but may produce a slightly denser loaf with less chew. You can also experiment with adding vital wheat gluten to all-purpose flour.
- → How should I store finished sourdough?
-
Store at room temperature in a paper bag for up to 2 days, wrapped in a cloth to prevent drying. For longer storage, slice and freeze in an airtight bag—toast directly from frozen. Refrigeration isn't recommended as it accelerates staling.